Key Takeaways
- Skimming is perfect for small cosmetic updates. Full replastering works best for major wall damage or uneven surfaces.
- Skimming is usually faster, less invasive, and cheaper. It does not address underlying structural problems.
- Full replastering is more laborious and costly. It offers far more durability and a sound basis for long-term outcomes.
- Checking wall and substrate condition, including damp and moisture checks, is crucial to deciding which option to go for.
- Both methods must be well prepared, and the finish must be well executed.
- Investing in quality plastering and aftercare increases property value and minimises repair work.
Skimming vs full replastering - what’s the difference? Skimming involves coating over the old surface with a thin layer of plaster to disguise marks and micro-cracks. Full replastering is a bigger job where the old plaster is stripped and fresh plaster is re-applied from scratch. This is a good solution for walls that have deep damage or damp. Both options help achieve a new look, but they suit different requirements and price points. Skimming is quick and cheaper, while full replastering is slower, more expensive and longer-lasting. Understanding the key differences between both methods helps London homeowners and renters make the best choice for their home.
Skimming vs Full Replastering Explained
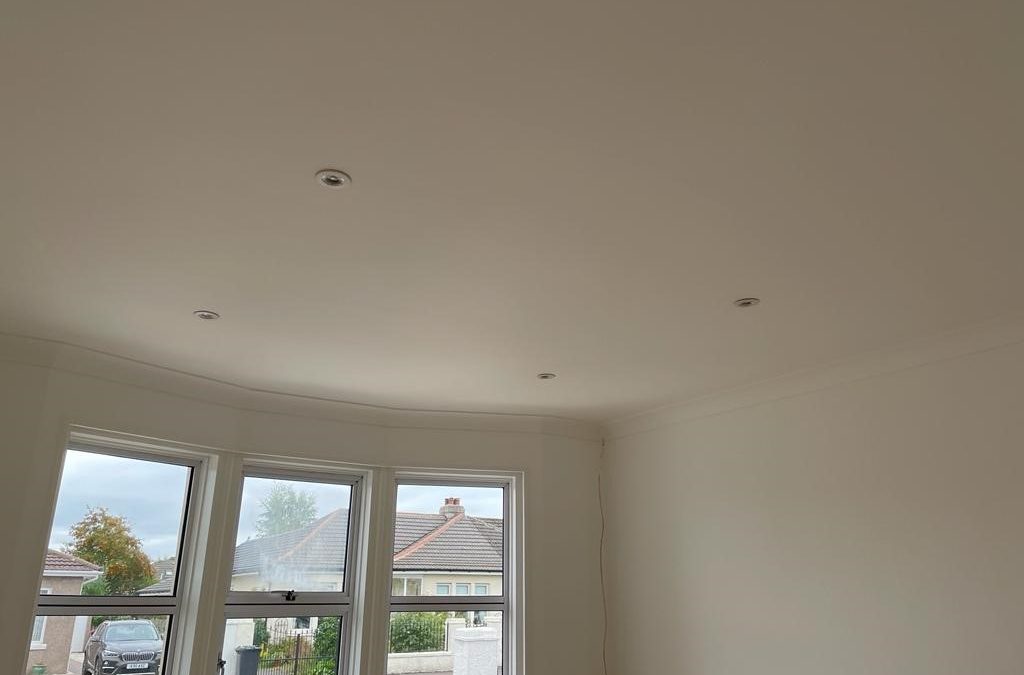
Skimming and full plastering both enhance the appearance and usability of our internal walls. While skimming involves applying a thin coat of plaster, usually 5 to 8 mm thick, over existing surfaces to rejuvenate tired or slightly uneven walls, full replastering requires a professional plasterer to clear off the existing plaster altogether before applying new coats. This method is essential for more extensively damaged walls or structural renovations, ensuring improved construction quality.
1. The Process
Skimming plaster involves prepping the wall, cleaning and repairing any cracks, and then applying a smooth skim coat with basic tools. This thin layer cures quickly and is less messy than full plastering, which requires eliminating the old plaster and addressing deeper problems before applying new coats. Each of these coats, which may include multiple layers, must be evenly distributed and allowed to dry properly. While skimming is a job some DIYers attempt, full replastering should be left to a professional plasterer for optimal results.
2. The Cost
Skimming plaster is typically the cheaper alternative, with an average UK room priced around £480, while full plastering for that same room might cost as much as £755. The costs can vary depending on the size of the room and the condition of the walls. If there’s concealed damage or preparation required, costs can increase rapidly. The type of plaster, such as gypsum, lime, and sustainable building products, can affect the overall cost and how long the finish lasts.
3. The Timescale
Skimming one room could take as little as one or two hours, plus two to three days to dry, while full plastering typically requires two to three days for the work itself and a week or so for proper drying, especially if multiple layers are needed. More rooms mean a longer project and increased coordination, so owners should anticipate some inconvenience when undertaking a full replastering project.
4. The Durability
Full replastering usually offers a more durable finish as it resolves fundamental issues and reinstates the wall, making it ideal for extensive plastering work. Skimming plaster only addresses minor imperfections; deep damage would cause problems to resurface. Material quality significantly affects the longevity of both approaches, and using lime plaster provides additional sustainability benefits. Good maintenance ensures both finishes last.
5. The Final Finish
Either method, whether full plastering or skimming plaster, gives a smooth finish that is ready for paint or wallpaper. Skimming is perfect for a refreshing change with minimal hassle, while full replastering presents opportunities for textured or decorative finishes. It’s all in the skill of the professional plasterer – great plasterwork enhances the entire room. Both techniques can rejuvenate an old or tired space if executed well.
Diagnosing Your Walls
Deciding whether to skim coat or fully plaster involves a careful examination of your walls. Common issues in older UK homes, particularly with damp, include cracks, dents, and peeling paint. A professional plasterer can diagnose your walls, preventing unnecessary expenditure and ensuring a smooth finish. Before selecting a technique, consider both superficial defects and underlying issues, as what’s apparent often indicates what’s concealed.
When to Skim
Skimming is good for walls that are fundamentally solid but require a freshen up. Stepping up to hairline cracks, old paint stains and light knocks incites the use of skimming most often. This thin layer produces a clean, flat surface, perfect for painting or decorating. Houses with good, sound plaster below get the best of all. There is no need to gut what isn’t broken.
This approach quickens the projects. Drying will occur in two to three days for most rooms. It’s a firm favourite when time is short or when preparing to sell or rent. ‘Skimming is far less disruptive, cheaper and messier.
- Existing plaster is firm and well-bonded
- Minor scuffs, surface cracks, old wallpaper residue
- Rooms that have settled but are structurally sound
- Quick cosmetic updates before painting or decorating
When to Replaster
Old plaster needs to be fully replastered as it is crumbling away, full of deep cracks or damp. If pushing on the wall causes it to crumble or if old water damage is evident, patching up won’t last. Full replastering takes everything back to brick or block and then builds new layers, which is often essential in Victorian or pre-war homes after decades of use. A full job can take a week to dry, depending on the weather, wall thickness and ventilation.
This method is optimal for large renovations or whenever insulation is being added or electrical re-wiring is required. It provides a smooth base, ensures good adhesion for subsequent layers and aids durability over time.
- Plaster is loose, hollow-sounding, or crumbling
- Big cracks through plaster or down to brick
- Evidence of persistent moisture or mould
- Recent structural repairs, major renovations, or new builds
The Hidden Factors
Plastering decisions frequently depend on what’s hidden from sight. It’s tempting for homeowners and builders to be completely finish-focused. The groundwork beneath is equally important. Forgetting these hidden factors can result in expensive repairs, wasted materials and disappointing finishes further on.
Hidden factors affecting plastering decisions include:
- Substrate condition and stability
- Presence of damp or moisture
- Product construction and durability
- Compatibility with existing materials
- Local climate and environmental conditions
- Lifespan and sustainability of chosen products
Substrate Condition
The condition of the wall or ceiling beneath the old plaster is vital to achieving a smooth finish. If you have flaking paint, areas of loose render, or crumbling plaster, skimming plaster isn’t going to last. Moisture testing can be conducted using a basic meter or by taping clear plastic sheeting to the wall and checking for condensation after 24 hours. Any signs of damp or loose material indicate that the base must be prioritized first. A strong, clean, and dry substrate is always required, whether you are skimming or starting anew with a full plastering project. Even the finest plaster needs this to ensure product longevity.
Damp and Moisture
Damp is one of the most prevalent issues in UK properties, particularly older ones. Moisture can de-bond plaster from the wall, leading to bubbling, cracking, or mould. Always resolve leaks, condensation, or rising damp beforehand. While skimming plaster over wet patches may seem effective initially, it won’t take long before it becomes a problem. For kitchens, bathrooms, or basements, using water-resistant plasters or additives will avert issues down the line. Employing professional plasterers and breathable products in historic or solid-walled homes allows walls to dry out and prevents moisture from being trapped.
Long-Term Value
Good plastering, especially full plastering, does more than look smart; it can aid insulation, minimize draughts, and keep your home warm. Opt for well-built items such as heavier jackets, appropriate stitching, and good seals, so you won’t be busy replacing the thing every couple of years. In the long run, cheaper options might cost less now but could lead to far greater repairs, waste, and disruption. Longer-lasting products, including skimming plaster techniques, help to reduce returns, cut admin time, and support sustainability by avoiding unnecessary replacements. When in doubt, ask yourself how long you want the results to last, not just today but for years to come.
The Tradesperson's Verdict: My Personal Take
Skimming and full plastering both have their place, depending on the job and the walls. Good plasterers will often tell you that skimming is ideal for areas that are mostly sound but require a flat finish. This technique involves applying a thinner coat of skimming plaster, generally 2 to 3 millimeters, which can effectively conceal minor blemishes and give walls a new appearance. Skimming is less messy and faster than full replastering, making it a popular choice for many building projects. However, the downside is that it won’t solve more serious issues, such as big cracks or blown plaster. If the base is weak, skimming will not hold up for long, leading to problems within a year or two.
Full replastering is a more extensive job that entails removing old plaster down to the brick or blockwork, then applying new base and finishing coats. Although it’s pricier and takes longer, full plastering is the only way to address serious damage or damp issues effectively. When executed properly by a professional plasterer, full replastering can ensure walls last for generations. It’s a solid repair method, but it requires careful preparation and quality materials. Plasterers emphasize that cutting corners, such as not allowing each coat to dry, can result in cracks, hollows, or weak bonds. For old London terraces and period homes, full replastering is often the safer bet, particularly where there’s been water damage or the walls are uneven.
Access to someone who knows what they’re doing is crucial for both roles. When a tradesperson uses the appropriate materials for years, the finish endures. If the incorrect product is applied or low-end mixes are used, it could look perfect initially but deteriorate shortly after. That’s why seasoned plasterers opt for higher-quality mixes or incorporate fibres for stress points or busy areas. They prioritize durable products over the cheapest option, as this can lead to additional waste, rework, and even further environmental damage down the line. A product that lasts is a product that minimizes headaches – less packaging, fewer complaints, and a lower overall cost. Good tradespeople will check wall thickness, joins, and fixing points to ensure the construction matches the house’s requirements.
While DIY plastering may seem tempting, it can easily go wrong. Not prepping the surface, mixing the plaster too thick or too thin, or rushing the job can lead to the need for redoing it sooner than expected. Homeowners are often surprised at how challenging it is to achieve a flat, smooth finish. Getting recommendations for trustworthy plasterers from neighbors or local trade groups can help avoid bad jobs and wasted money, ensuring the project is completed to a high standard.
Preparing for the Plasterer
Prepping your space for work 101 is essential for ensuring a smooth finish. It clears space for the plasterer to work and means fewer interruptions. Clear as much furniture out as possible. For anything that has to stay, cover it in dust sheets or plastic. Plastering, whether skimming plaster or full replastering, creates fine dust that coats everything, so floors need covering too. If you have carpets, either floor protectors or sheets taped down will keep dust and debris out of the pile. Hard floors will appreciate having a layer of protection, particularly around work areas and doorways.
Wiping clean the walls is crucial before any extensive plastering work begins. Old paint, wallpaper, and any peeling plaster should go before the professional plasterer gets there. A damp cloth will remove surface dust, while any grease or stains need cleaning, as they can prevent plaster from adhering properly. For damaged and previously damp walls, a professional may strip back all the way to sound plaster. Sometimes a bonding agent goes on next. This aids the new plaster to adhere and hold longer, which is essential for both skimming and full plastering. Surfaces in new builds or severely damaged rooms will often require a full plaster, as skimming is more suited to light repairs.
Listen to your plasterer about what you want for your building projects. Go through which rooms need work, the finish you expect, and how much mess you can put up with. Ask how long it will take. It will take around two to three days for a standard room, including preparation. Tell them if you have deadlines or need to keep areas clean for pets or children. Good planning means fewer surprises and a smoother job.
Keep the room ventilated. Open windows where you can, and use fans if safe. Fresh air allows plaster to dry evenly and curtails dust levels. Plaster applied in thick layers of around 10 to 15 millimetres takes five to seven days to dry out completely. Good airflow reduces residual moisture and expedites the drying process, which is vital for getting back to everyday life.
Aftercare for New Plaster
New plaster needs some TLC in order to survive and maintain its appearance. Following skimming plaster and full plastering, it will require careful attention once the project is complete. First of all, ensure the plaster dries properly. Most new plaster will dry out within 5 to 7 days; however, this duration can vary depending on coat depth and weather conditions. Excessive heat or cold can cause the plaster to crack, so maintaining a stable temperature environment is crucial. 'Open a few windows to create a through draft, but avoid making the room cold and clammy.' A dehumidifier will be helpful if the air feels stale, but be cautious not to run it at full capacity, as that might dry the plaster too quickly.
Don’t be tempted to paint or wallpaper too soon. If you apply paint or seal the plaster before it’s dry, the finish might become patchy or peel later. A good indicator is when the plaster changes from dark pink to a pale uniform color. If in doubt, it’s best to wait a little longer before you decorate. Additionally, never hang shelves, mirrors, or heavy items on the new plaster for a minimum of 7 to 10 days. The plaster underneath will still be weak even if the surface appears dry.
Humidity is important. All plaster absorbs water from air, and if too much gets absorbed, it can dampen the drying process or create stains. If you’re in a damp area or it’s raining heavily, keep the room aired out and use a dehumidifier where necessary. Avoid mopping floors with excessive amounts of water or adding wet things into the room as the plaster cures.
Regular checks are wise. Keep an eye out for early cracks, bulges, or strange patches. If you notice hairline cracks, they can typically be filled or sanded down before painting. Spotting these issues early means they won’t snowball into larger problems that could compromise the construction quality of your building projects.
Conclusion
To revive tired walls, skimming provides a speedy facelift. It smooths light marks and aids adhesion of old paint. Full replastering deals with deep cracks, blown plaster and damp. It provides a new start but involves additional time and expense. Skimming vs full replastering: What’s the difference? A small hallway might just need a skim but a crumbling Victorian lounge demands the full works. Tradesmen usually see concealed disaster, so a word with the local plasterer spares a bodge. Prepped to get your walls sorted? Grab a couple of quotes. Hit me with the tough stuff. Choose a pro on your street who understands your needs. For more, check out: skimming vs full replaster – what’s the difference?
Frequently Asked Questions
What is the main difference between skimming and full replastering?
Skimming plaster involves applying a new, thin coating to already plastered walls, offering a smooth finish compared to full plastering, which is more extensive.
When should I choose skimming over replastering?
Opt for skimming plaster if your walls are generally in good condition but require a clean, smooth finish, making it ideal for smaller cracks or blemishes.
Is full replastering more expensive than skimming?
Yes, full plastering is more expensive due to its labor-intensive nature and the need for quality materials, while skimming plaster offers a faster, more cost-effective solution.
How long does it take for skimming and replastering to dry?
Skimmed walls typically take three to five days to dry, while full plastering can take a week or more depending on the material quality and room conditions.
Can any wall be skimmed, or do some need full replastering?
Not all walls are compatible with skimming plaster. If the original plaster is loose, damp, or crumbling, then full plastering will usually be required.
Do I need to prepare my room before the plasterer arrives?
Yes, ask me to shift furniture, protect floors, and take down wall hangings to ensure the professional plasterer can work efficiently and protect your items during extensive plastering work.
Is new plaster easy to maintain?
Yes, when fully dry and painted, new plaster, especially after extensive plastering work, is easy to clean. Just don’t hang anything too heavy until the plaster is fully set.